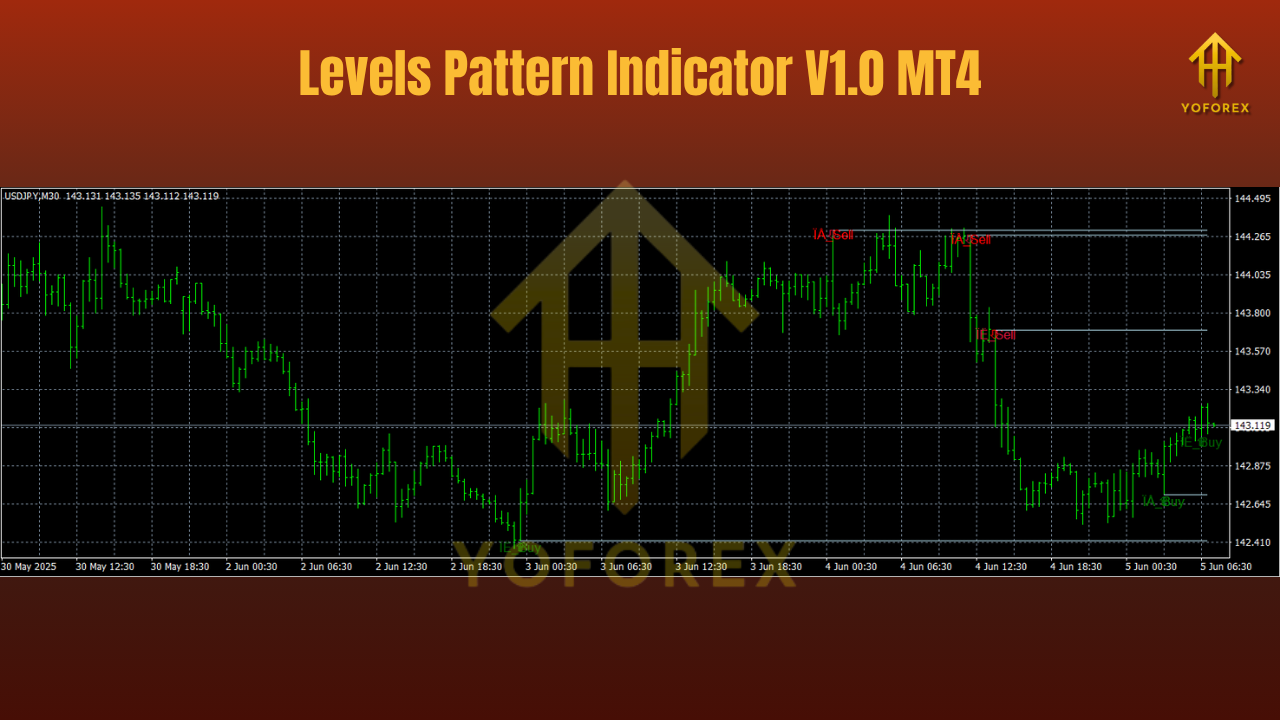
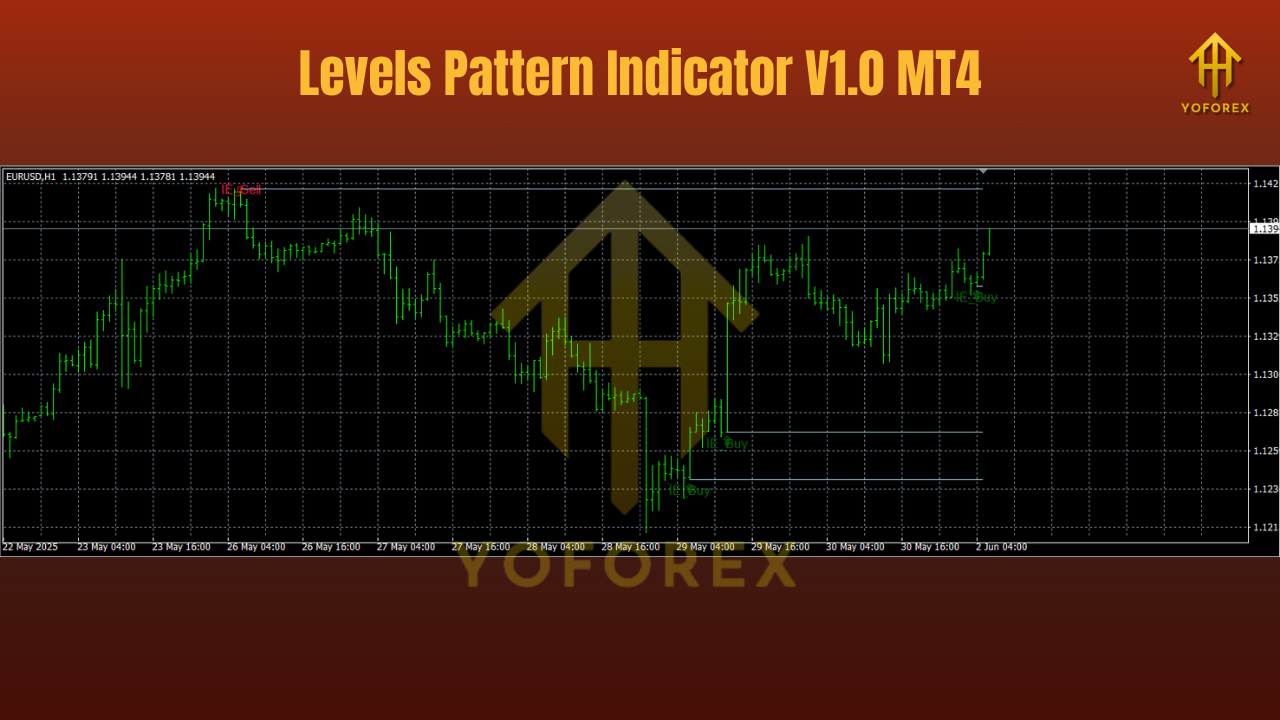
If your charts feel noisy and you’re never sure which support/resistance really matters, the Levels Pattern Indicator V1.0 for MT4 brings order to the chaos. It automatically detects, scores, and visualizes the most respected price levels across any pair and any timeframe, then highlights actionable patterns around those levels—breakouts, retests, bounces, and fakeouts. Whether you scalp on M5 or swing trade on D1, this tool turns “lines on a chart” into a structured trading plan.
Pairs: Multi-pair (majors, minors, metals, indices via MT4 CFDs)
Timeframes: Multi (M1–MN; sweet spot: M5–H4 for FX, H1–D1 for metals/indices)
What the Indicator Actually Does
The Levels Pattern Indicator scans historical bars to find swing reaction points—places where price repeatedly stalls, reverses, or accelerates. It then clusters nearby reactions into zones, ranks them by touch count + rejection strength + recency, and paints clean horizontal levels (with optional bands) directly on your chart. On top of that, it watches how price interacts with these zones in real time and flags patterns:
- Bounce pattern: Respect at a level after a clean approach.
- Breakout pattern: Strong close through a level with momentum.
- Retest pattern: First pullback to a broken level acting as new support/resistance.
- Fakeout pattern: Quick push beyond a level followed by an immediate reclaim.
The result: fewer subjective lines, more repeatable trades.
Why Levels Matter (and Keep Mattering)
Markets are social systems. Traders tend to cluster orders around obvious prices: prior highs/lows, session opens, round numbers. These become decision points. By objectively scoring and tracking them across timeframes, you can:
- Trade with context (where is price relative to key levels?),
- Choose higher-quality entries (at or around decision points),
- Manage risk with structure-based stops (beyond a level, not in the middle of nowhere),
- Avoid overtrading the “in-between” noise.
Key Features at a Glance
- Auto-Level Detection: Discovers support/resistance zones using swing reactions and clustering.
- Scoring & Decay: Weighs touches, wick strength, and recency; older levels fade unless refreshed.
- Pattern Engine: Prints bounce, breakout, retest, and fakeout markers only when criteria are met.
- Multi-Timeframe Overlay: Optionally show higher-timeframe (HTF) levels on lower charts for confluence.
- Clean Visualization: Distinct colors for strong/medium/minor levels; optional zone bands.
- Alerts: Pop-up/push/email for specific patterns at selected levels.
How It Works (Under the Hood)
- Swing Map: Locates pivot highs/lows with configurable sensitivity.
- Cluster Build: Groups reactions within a dynamic price tolerance to form level zones.
- Score & Rank: Calculates a score per zone based on reaction count, wick penetration, and time decay.
- Pattern Watch: When price approaches a zone, it evaluates momentum, candle close, and micro-structure to label a bounce, breakout, retest, or fakeout.
- Update Cycle: As new bars print, zones can strengthen, weaken, or expire—keeping the chart relevant.

Recommended Settings
Intraday (M5–M15)
- Swing Sensitivity: 3–5
- Cluster Tolerance: Tight (e.g., 0.15–0.25 × ATR)
- Minimum Score to Plot: Medium
- Patterns Enabled: Bounce, Breakout, Retest
- Alerts: Intrabar off (use on close) to reduce noise
Day Trading (M30–H1)
- Swing Sensitivity: 5–7
- Cluster Tolerance: Medium (≈0.25–0.35 × ATR)
- Minimum Score to Plot: Medium–High
- Patterns Enabled: All (include Fakeout)
- HTF Overlay: Show H4 levels lightly
Swing (H4–D1)
- Swing Sensitivity: 7–10
- Cluster Tolerance: Wider (≈0.35–0.50 × ATR)
- Minimum Score to Plot: High only
- Patterns Enabled: Breakout + Retest preferred
- Alerts: Close-confirmed only
Quick start: EURUSD H1 — Sensitivity 5, Medium tolerance, High-only levels, Patterns: Bounce/Breakout/Retest, Alerts on bar close.
Three Practical Strategies
1) Bounce-to-Mean (Range Tactics)
- Context: Price oscillates between two strong, closely spaced zones.
- Entry: At the upper zone, look for bearish rejection (wick + close back in) for shorts; do the opposite at the lower zone for longs.
- Stop: Just outside the zone (beyond wicks) or 1× ATR(14), whichever is greater.
- Targets: Mid-range for partials; opposite zone for runner.
- Tip: Stand down during high-impact news—ranges often break.
2) Breakout + First Retest (Structure Shift)
- Context: Multiple rejections at a level; then a decisive close through it.
- Entry: On the first clean retest of that level as new S/R (pattern label: Retest).
- Stop: Beyond the retest low/high by 1× ATR(14) or beyond the zone.
- Targets: 1R at nearby micro-level; 2R at next ranked level.
- Tip: Avoid chasing the breakout candle; retests generally offer better R:R.
3) Trap & Reclaim (Fakeout Fade)
- Context: Price spikes through a strong level but closes back inside quickly (Fakeout).
- Entry: Enter with the reclaim bar close.
- Stop: Past the fakeout wick by 1× ATR(14).
- Targets: Prior range mid, then opposite boundary.
- Tip: Best on H1+ to reduce whipsaw risk.
Risk Management That Keeps You in the Game
- ATR Stops, Not Feel: Place stops where your thesis is invalidated (outside the level/zone) using ATR to give air.
- Size to the Stop: Risk a fixed fraction of equity (e.g., 0.5–1%) so larger stops mean smaller lots.
- One Idea per Chart: Don’t run conflicting strategies on the same symbol/timeframe simultaneously.
- No Martingale: The indicator helps you find better levels, not bigger bets. Scale out if a level fails.
- Session Discipline: Intraday traders: focus on London/NY overlap for cleaner follow-through.
Backtesting & Optimization Playbook
- Pick One Pair & TF: e.g., GBPUSD H1.
- Collect 50–100 signals: Tag them as Bounce/Breakout/Retest/Fakeout.
- Track Metrics: Win rate, avg R, time-to-target, MAE/MFE, max DD.
- Tune Gradually: Adjust Minimum Score and Cluster Tolerance before tweaking sensitivity.
- Validate: Re-run on a second pair and adjacent timeframe (e.g., EURUSD H1/H4).
- Forward Test: 2–4 weeks on demo/live micro before scaling.

Best Markets & Timeframes
- Forex Majors (EURUSD, GBPUSD, USDJPY): M15–H1 for intraday clarity; H4 for swing.
- Gold (XAUUSD): H1–D1; use wider tolerance due to volatility.
- Indices (NAS100, US30): H1–H4; stick to high-score levels.
- Crypto CFDs: Only on higher timeframes (H4–D1); enable Fakeout filter.
Installation & Workflow
- Copy the indicator to MQL4/Indicators and restart MT4.
- Attach to chart → choose preset (Intraday / Day Trade / Swing).
- Toggle HTF Overlay if you want higher-timeframe levels visible.
- Enable pattern types you actually plan to trade.
- Turn on alerts on bar close; screenshot and log each signal to build your playbook.
Pro Tips & Common Mistakes
Do:
- Align with a trend filter (e.g., above 200-EMA = long-only bounces/retests).
- Keep charts uncluttered—hide minor levels until needed.
- Use time-of-day filters for intraday consistency.
Don’t:
- Enter on the first touch by default—wait for the pattern (rejection or retest).
- Place stops inside the level band. That’s where noise lives.
- Over-optimize parameters to history; forward-test your baseline.
Final Thoughts
The Levels Pattern Indicator V1.0 MT4 gives you an objective map and a repeatable trigger set—no more guessing which line matters. Trade the reaction, not just the level: bounces, breakouts, retests, and fakeouts, backed by scoring and multi-timeframe context. Add disciplined risk and a small, well-defined playbook and you’ll likely trade less, but with more edge.
Join our Telegram for the latest updates and support


