Introduction
The foreign exchange market constantly moves between areas of buying pressure and selling pressure. Traders who can read these imbalances gain a major advantage, especially when they want to catch reversals or join trends from the best possible price levels. The RNS Supply and Demand Indicator is designed to make these key zones visible so that traders do not have to guess where institutional activity is likely to appear.
This in-depth guide explains how the RNS Supply and Demand Indicator works, why supply and demand zones are so powerful, and how you can build a complete trading plan around this tool. You will learn the logic behind its signals, how to combine it with confirmations, how to manage risk, and how to avoid common mistakes when using the RNS Supply and Demand Indicator in real trading conditions.
What Is the RNS Supply and Demand Indicator?
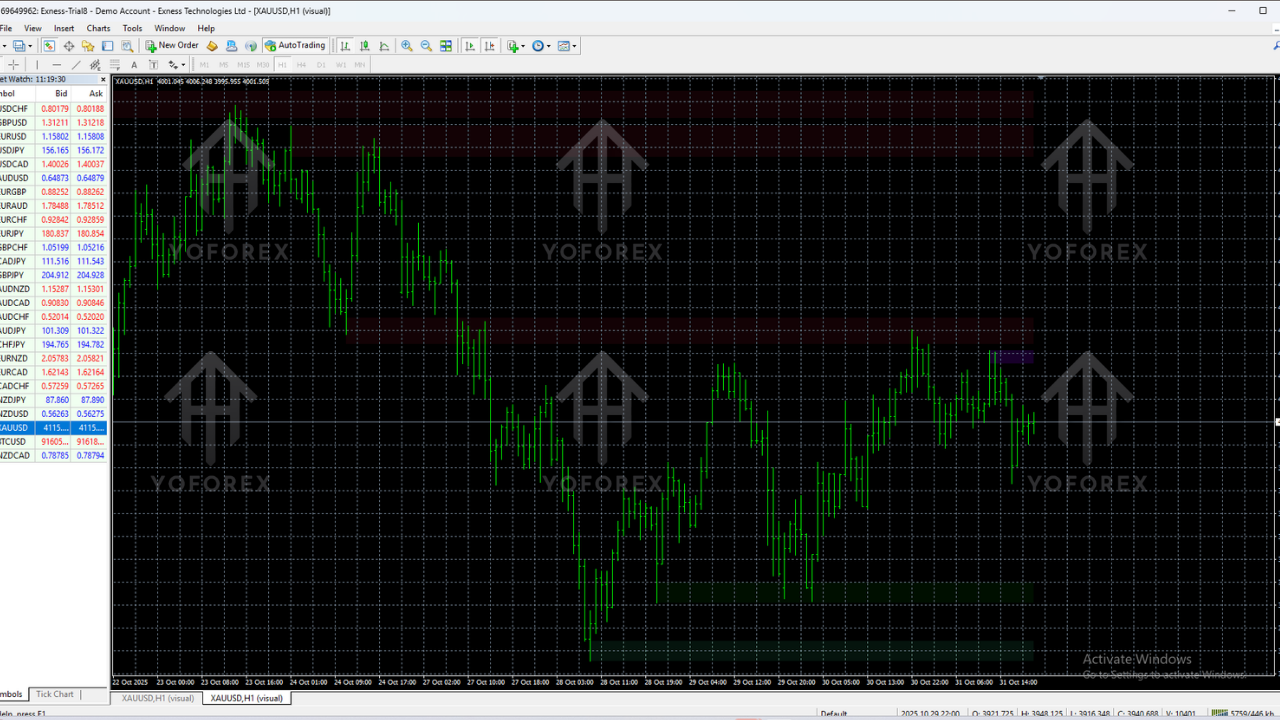
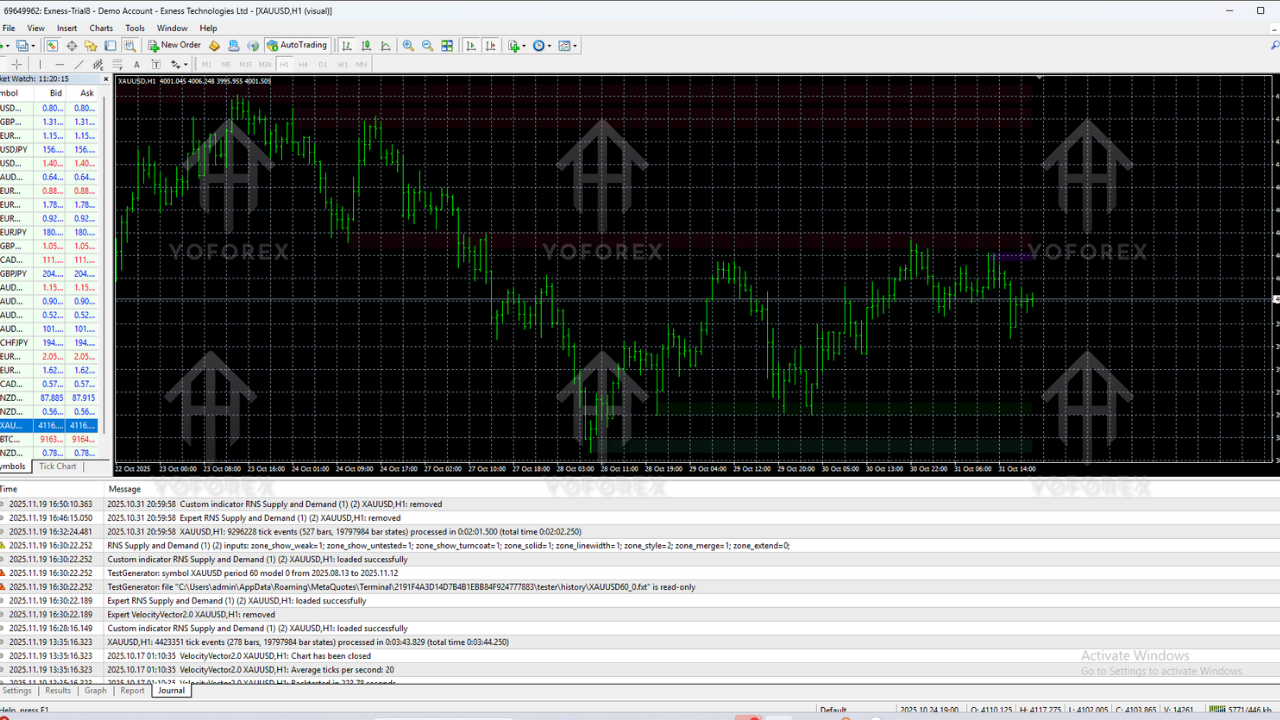
The RNS Supply and Demand Indicator is a technical analysis tool for the MetaTrader 4 platform that automatically identifies supply and demand zones on the chart. These zones are created when price leaves an area with strong momentum after a period of consolidation, indicating that large orders stepped into the market. The indicator detects these structures and paints them on the chart as clearly defined regions where price has a high chance of reacting again in the future.
By highlighting these institutional order zones, the RNS Supply and Demand Indicator allows traders to see where strong buying or selling previously occurred. Instead of manually drawing rectangles and constantly redrawing levels, traders can use the indicator to quickly spot high-probability trading areas and focus on confirmation and execution.
Unlike many generic support and resistance tools that simply connect highs and lows, the RNS Supply and Demand Indicator defines zones based on strong price imbalances. This means that every marked region on the chart comes from a decisive move, not just a random pivot point. As a result, the zones often line up with the footprints of institutional participants, making them more meaningful than simple static lines.
How the Indicator Works
The core logic behind the RNS Supply and Demand Indicator revolves around identifying price imbalances and the zones that cause them. The indicator looks for areas where price moves away rapidly from a base, leaving behind unfilled orders. These areas become potential supply zones (where sellers dominated) or demand zones (where buyers dominated).
- Demand zones mark regions where buyers stepped in aggressively, pushing price higher from a consolidation or accumulation area.
- Supply zones highlight areas where sellers took control, driving price downward after a brief base or distribution zone.
- Fresh zones are newly created areas that have not yet been retested by price and often carry the highest probability of a reaction.
- Retested zones are areas that price has already visited and used as support or resistance, which can still be valid but may be weaker.
All of this scanning, marking, and updating is handled automatically by the RNS Supply and Demand Indicator, so traders can spend more time preparing trade plans and less time manually drawing boxes on their charts.
Key Features of the RNS Supply and Demand Indicator
Below are the most important features built into the RNS Supply and Demand Indicator, designed to support both new and experienced traders.
1. Automatic Zone Detection
The indicator automatically detects and draws supply and demand zones based on historical price action. It analyzes candle structures, impulsive moves, and bases to highlight the areas where price is most likely to react again. This automation significantly reduces analysis time and removes much of the subjectivity that comes with manually drawing levels.
2. Multi-Timeframe Compatibility
You can apply the indicator to any MT4 timeframe, from M1 up to the Daily chart. Short-term traders can focus on lower timeframes to find intraday zones, while swing traders prefer H1, H4, or Daily zones for larger moves. The indicator can also work with multi-timeframe concepts, where higher timeframe zones are used as the main bias and lower timeframe zones are used for entry.
3. Non-Repainting Confirmed Zones
Once a zone is confirmed, it does not repaint. This means that what you saw in real time remains on the chart afterward, making it possible to backtest and evaluate the performance of your strategy with confidence. Non-repainting behavior is particularly important when using the indicator in a rule-based trading system.
4. Customizable Visuals
Traders can customize the colors and transparency of supply and demand zones to create a clean, easy-to-read chart layout. You can assign one color to demand zones and another to supply zones, adjust the opacity, and choose how prominently you want zones to appear on the chart.
5. Price Alerts on Zone Touch
The indicator can trigger alerts when price returns to a predefined zone. This helps traders avoid staring at screens all day and allows them to focus on other tasks while waiting for price to approach a key area. Once alerted, traders can step in, analyze price action, and decide whether to take a trade.
6. Works on Multiple Symbols
The tool is not limited to currency pairs. You can use it on forex, gold, indices, and other instruments offered by your broker on the MT4 platform. This opens up many trading opportunities across different markets, all using the same consistent zone-based logic.
Why Supply and Demand Trading Matters
Supply and demand trading focuses on the most fundamental law of markets: when demand is greater than supply, price rises; when supply exceeds demand, price falls. Instead of chasing indicators that lag behind price, traders study where major imbalances formed in the past and position themselves for potential reactions when those levels are revisited. When combined with the RNS Supply and Demand Indicator, these principles become easier to apply systematically on any chart.
Institutional traders and large players often build and close positions in stages. These stages are visible on the chart as bases, tight consolidations, or sharp candles leaving a zone. By reading these footprints, zone-based traders can align themselves with smart money behavior and avoid trading in random areas of the chart where the probability of success is lower.
Best Timeframes for Using the Indicator
You can use the RNS Supply and Demand Indicator confidently on multiple timeframes, but the ideal timeframe depends on your trading style and schedule.
- Scalpers may focus on M1, M5, or M15, using very small zones and aiming for quick intraday moves.
- Day traders often prefer M15, M30, and H1 to balance noise and clarity while holding trades for several hours.
- Swing traders typically look at H1, H4, or Daily timeframes to find strong major zones and hold positions for days.
For most traders, H1 and H4 are the most practical choices because they provide clear zones, filter out one-candle noise, and still offer frequent trading opportunities.

Trading Strategy Using the RNS Supply and Demand Indicator
The following step-by-step framework shows how to apply the RNS Supply and Demand Indicator in a structured trading plan. You can adapt these rules to your own risk profile and favorite pairs, but the logic remains the same.
Step 1: Start With Higher Timeframe Bias
Begin by scanning H4 or H1 to see where major supply and demand zones are located. Let the RNS Supply and Demand Indicator show you which areas produced strong moves in the past and mark those as your primary reference levels. Identify whether price is currently closer to a supply zone or a demand zone to determine directional bias.
Step 2: Drop to a Lower Timeframe for Entries
Once you know the higher timeframe context, drop to a lower timeframe such as M15 or M30 to look for fresh zones inside or near the higher timeframe area. This is where you will refine your entry and manage your risk more precisely. Lower timeframe zones sometimes form just before price reacts at a higher timeframe level, giving you tighter stop loss opportunities.
Step 3: Wait for Confirmation
Rather than placing blind limit orders at every zone, wait for price action confirmation. Look for rejection wicks, engulfing candles, or structure breaks that confirm that the zone is being respected. Use oscillators or volume only as secondary confirmation tools. The key is to build a checklist so that you do not rely blindly on the RNS Supply and Demand Indicator alone for entry decisions.
Step 4: Place Stops and Targets Logically
Your stop loss should go beyond the zone by a safe distance to avoid getting stopped out by minor spikes. Targets can be set at previous swing highs or lows, or at the next opposing zone. Always ensure that the reward-to-risk ratio makes sense, preferably aiming for at least 1:2 or better on most setups.
Step 5: Manage Trades Actively
Once the trade moves in your favor, consider moving your stop to breakeven after a reasonable distance or scaling out part of the position at intermediate structure levels. Proper trade management is crucial to making the most from winning trades while keeping losses under control.
Money Management and Risk Control
Even with a high-probability tool like the RNS Supply and Demand Indicator, risk control remains fundamental. No indicator is perfect, and losses are part of trading. What separates successful traders from struggling ones is not the absence of losses but the way they manage risk.
Use a fixed percentage risk per trade, such as 1% or 2% of your account balance. Avoid stacking multiple positions in the same direction at closely aligned zones, and never increase position size simply to recover from previous losses. Zone-based trading works best when it is combined with strict account protection rules and emotional discipline.
Best Settings for the RNS Supply and Demand Indicator
Out of the box, the RNS Supply and Demand Indicator works well for most traders. However, fine-tuning certain parameters can help you adapt the tool to your market and style.
- Zone depth controls how far back in history the indicator looks when identifying bases and imbalances.
- Minimum strength filters out small or weak zones that may not be worth trading, leaving only more significant levels.
- Visualization options allow you to define colors, border thickness, and transparency so your chart remains readable.
- Alert parameters determine when alerts fire, such as when price touches a zone, breaks through it, or closes inside it.
Experiment with these settings on a demo account until you find a balance between the number of zones displayed and the clarity you need during analysis.
Who Should Use This Indicator?
The RNS Supply and Demand Indicator can benefit a wide range of traders. Beginners gain a visual guide to market structure, intermediate traders sharpen their entries, and advanced traders speed up analysis by automating the detection of key levels. It is particularly useful for traders who prefer clean charts and want to focus on the most meaningful market zones.
If you already rely on price action, support and resistance, or institutional concepts, this tool can fit smoothly into your workflow. It does not conflict with trend-following or counter-trend methods; instead, it provides a structured framework for both.
Advantages and Limitations
Like any tool, the RNS Supply and Demand Indicator has clear strengths but also certain limitations that traders need to understand before building a full strategy around it.
Advantages
- Reduces the time spent manually drawing and updating supply and demand zones.
- Highlights areas where strong institutional activity is likely to be present.
- Supports multi-timeframe analysis and structured trade planning.
- Encourages disciplined entries at logical levels rather than emotional chasing of price.
- Non-repainting confirmed zones help with reliable backtesting and learning.
Limitations
- The indicator is not a stand-alone signal generator and still requires confirmation and judgment.
- During extreme news events, zones may be temporarily overrun by large spikes.
- Too many zones on low timeframes can overwhelm traders who have not yet developed a filtering process.
Practical Installation and Setup Guide
To install the indicator, copy the file into your MT4 “Indicators” folder, refresh the Navigator, and then drag it onto your chart. Once the RNS Supply and Demand Indicator is installed correctly, you will see colored zones automatically appear around important supply and demand areas. From there, you can fine-tune the inputs, adjust colors, and save the chart layout as a template so you can quickly apply it to new symbols.
It is helpful to create separate templates for different timeframes or trading styles. For example, you can build a “swing trading” template with only higher timeframe zones and a “scalping” template with more sensitive settings that reveal smaller intraday levels.
Backtesting and Optimization
Before trading live, it is smart to backtest the RNS Supply and Demand Indicator on historical data. Scroll back on the chart, observe how price reacted to previously marked zones, and take notes of conditions that led to high-quality trades versus losses. This process will build your confidence and reveal the types of setups that fit your personality.
You can also forward-test on a demo account, taking trades according to fixed rules and tracking your results in a trading journal. Over time, you will see which pairs behave best with the indicator, which timeframes are most reliable, and whether you need to adjust your rules for entry, stop loss, and take profit.

Common Mistakes When Using the Indicator
One of the biggest errors is treating the RNS Supply and Demand Indicator as a signal generator instead of a decision-support tool. Traders sometimes take every zone touch as a trade regardless of trend direction, market context, or confirmation, which often leads to inconsistency.
Another common mistake is overcrowding the chart by activating every possible zone on every timeframe. This can cause analysis paralysis and make it difficult to choose trades. It is usually better to focus on the cleanest zones that align with the higher timeframe trend and avoid trading in the middle of the range where price is choppy.
Finally, some traders forget to factor in volatility and news. Strong news releases can temporarily push price beyond zones, so it is wise to reduce position size or step aside during high-impact events if you are not yet comfortable with fast-moving markets.
Advanced Tips and Best Practices
If you already understand market structure and price action, the RNS Supply and Demand Indicator can become the foundation of a multi-timeframe confluence system. Start with higher timeframe zones, combine them with trend direction, and then refine entries with lower timeframe confirmation. You can add simple tools like trendlines, moving averages, or volume to strengthen your confidence in each setup.
Keep a detailed trading journal, including screenshots of each trade showing the zones used, the reasoning behind the trade, and the outcome. Reviewing these records will help you refine your approach and recognize patterns in your own decision-making process. Over time, you will know at a glance which zone-based setups deserve your attention and which to ignore.
Frequently Asked Questions
Can I use the indicator on multiple currency pairs?
Yes, the RNS Supply and Demand Indicator can be used on multiple currency pairs as well as gold, indices, and other instruments provided by your broker on the MT4 platform. It is flexible enough to support traders who like to scan several markets for the best setups.
Is it suitable for beginners?
Beginners can use the indicator successfully if they take time to learn the basics of supply and demand trading and do not overcomplicate the strategy. It is important to start with a demo account, practice patiently, and combine the tool with clear rules for entries and exits.
Does the indicator repaint?
No, the RNS Supply and Demand Indicator does not repaint confirmed zones. Once a zone is validated, it remains stable on the chart, which is essential for building reliable backtests and learning from past market behavior.
Conclusion
The RNS Supply and Demand Indicator is a powerful and practical tool for traders who want to focus on high-quality levels on their charts rather than chase price in the middle of nowhere. By automatically identifying and drawing supply and demand zones, it simplifies analysis, speeds up chart preparation, and supports more disciplined decision-making.
When combined with sound risk management, clear confirmation rules, and a structured trading plan, the RNS Supply and Demand Indicator can become a central part of a professional trading workflow. Use it to find the best areas to do business in the market, stay patient, and let price come to your zones instead of forcing trades in low-probability locations.


